Creating a Shortcut for Windows Update in Windows Server 2016
I have seen people asking questions in some forums on how to create a shortcut for Windows Update in Windows Server 2016 and decided to write this article.
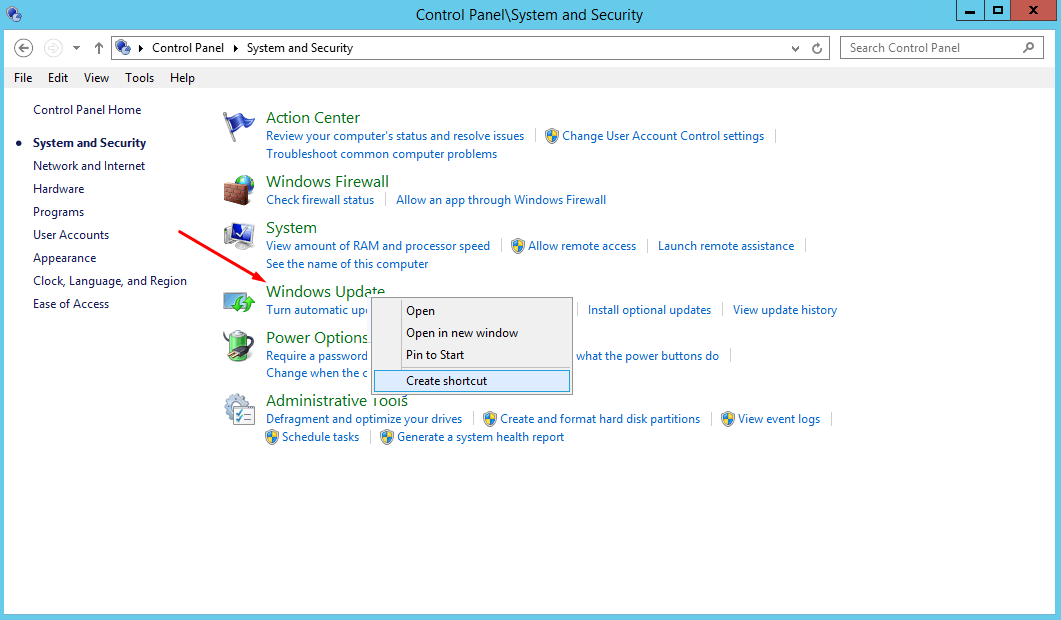
If you have been creating a shortcut for Windows Update in the past and now can’t seem to find the Windows Update section in Windows Server 2016, that’s because it doesn’t exist. In Windows Server 2012, Windows Update was a separate link under System and Security. All you have to do to create a shortcut is right click the Windows Update link and select Create shortcut, as shown in the screenshot below.
Windows Server 2012 Control Panel:
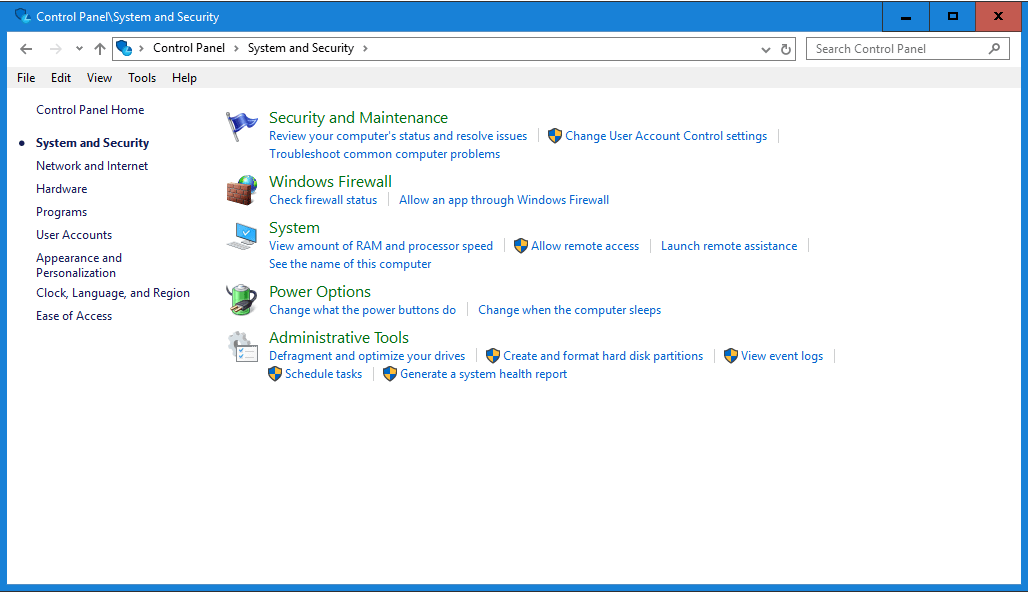
In Windows Server 2016, System and Security no longer includes a section for Windows Update. Windows Update has been moved to the Settings app. According to Microsoft, this change was made so that Windows Server 2016 and Windows 10 would have similar Windows Update desktop experience.
Windows Server 2016 Control Panel:
To access Windows Update, you can go to Settings, which is a Windows store app. There are several ways to get to the Settings app in Windows Server 2016. For example, you can click on the notification icon (circled in red below) in the taskbar and then click All Settings.

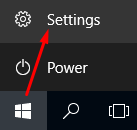
Alternatively, you can click the Windows Start button and then click Settings.
Of course, you can always type Settings in the Windows search box to locate the trusted Windows store app.
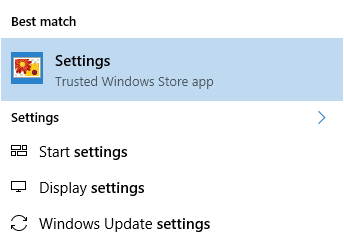
Once you are in Settings, click Update & security to get to the Windows Update screen.
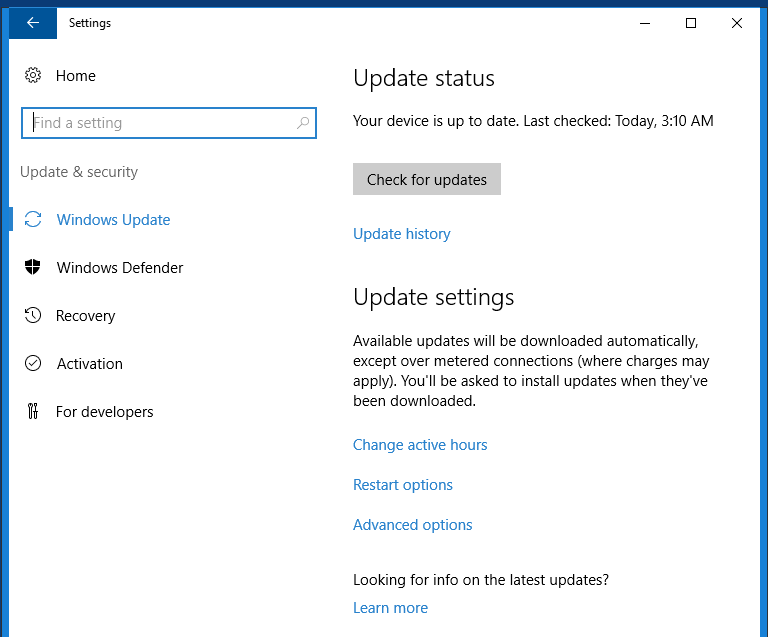
Server administrators are busy people and accessing the server tools quickly is important to them. That’s why they often create a shortcut to Windows Update. Yes, Windows Server 2016 can automatically notify you when the updates are available, but there are many reasons for administrators to go to the Windows Update screen, such as reviewing the updates that have been downloaded, changing configuration settings, reviewing Windows Update history, changing Advanced options, etc.
Creating a Shortcut for Windows Update
Unlike Windows Server 2012, there is no option to create a shortcut for Windows Update in the Control Panel, but you can use the following procedure to create a shortcut in Windows Server 2016.
- Right-click the desktop and select create shortcut.
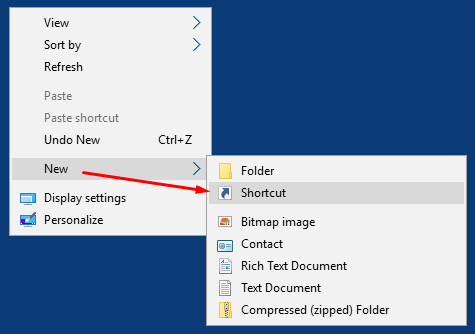
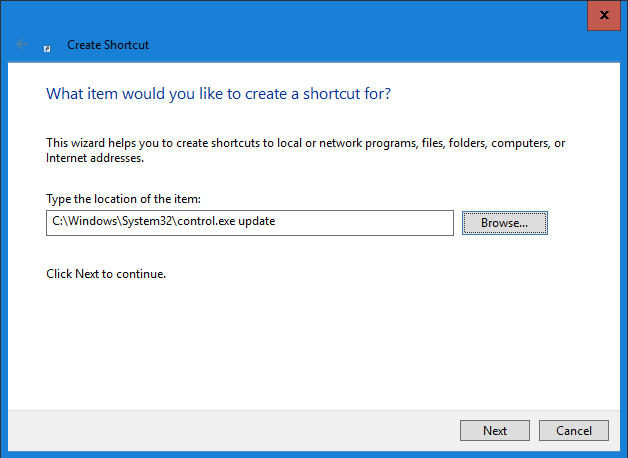
- In the Create Shortcut window, type C:\Windows\System32\control.exe update and then click Next.
NOTE: There is a space before the word update. Do not use quotes around this entry.
- On the the next screen, replace the word control.exe with Windows Update and then click Finish.
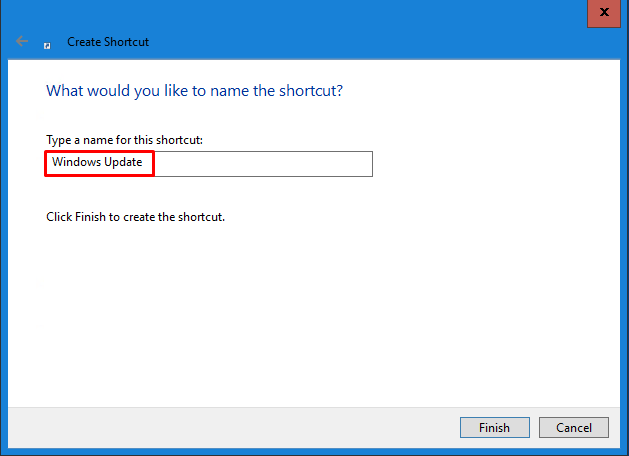
- Now you can quickly access Windows Update on your Windows Server 2016 desktop.

- If you don’t like the icon because it represents Control Panel, you can change the icon to look like the actual Windows Update icon used in Windows Server 2012, which looks like this.

- Right-click the shortcut and click Change Icon.
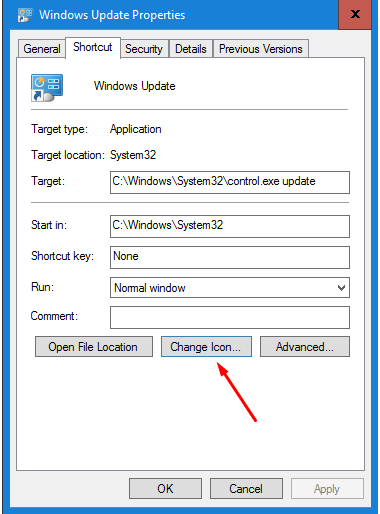
- Delete the text in the box and then click OK.
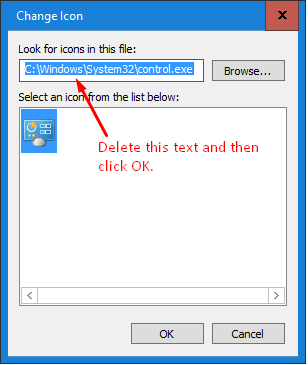
- Deleting the path will default to the shell32.dll, which contains dozens of icons for you to choose from. One of them happens to be the Windows Update icon. If you are having difficulty finding it, it’s in the 12th column, 3rd row. Select an icon that you like and then click OK.
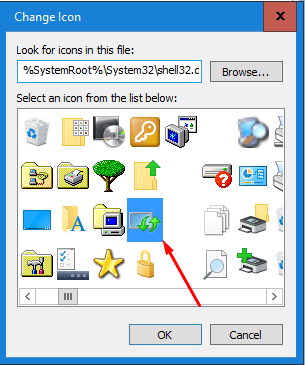
- Now you have a shortcut to Windows Update on your desktop just like the Windows Server 2012 shortcut and even your icon is the same.

By the way, if you want to create a shortcut for Control Panel, just remove the word update at the end and use the path C:\Windows\System32\control.exe.
| Thanks for reading my article. If you are interested in IT training & consulting services, please reach out to me. Visit ZubairAlexander.com for information on my professional background. |
Copyright © 2018 SeattlePro Enterprises, LLC. All rights reserved.


Thanks!
Very usefull.
Thank you
Thanks a lot, Alexander! 👍
Thanks! What I was looking for!
Thanks, in 2016 you can right click and say pin to start. but that does not work in 2019 or 2022 server, it just creates a shortcut to the settings in general.
@David: I just tried it both on Windows Server 2016 and Windows Server 2019 and was able to pin the shortcut to Start as well as taskbar. I discovered that there is a trick to displaying the option “Pin to taskbar” in WS2016 and WS2019. You must first use the option “Pin to Start”, only then you can see the option for “Pin to taskbar.” Once you’ve pinned them both, you can remove the shortcut either from Start or from the taskbar.