How to Backup and Restore Email Signatures in Microsoft Outlook
[responsivevoice_button voice="US English Male" buttontext="Listen to Post"]
This article applies to Outlook 2013, Outlook 2016, and Outlook 2019. For various reasons, I work on a lot of different computers and have a need for an Outlook profile on multiple computers. Because of this, sometimes I have a need to backup and import email signatures in Microsoft Outlook desktop application from one computer to another so that I don't have to manually create the signatures. It also helps me avoid copying and pasting signatures from one computer to another while I am connected using Remote Desktop Protocol (RDP). If I only had one or two signatures it wouldn't be a big deal, but I wear different hats in my profession and have to use multiple signatures. Copying and pasting them is not very convenient. That's not the only reason why I have a need to backup my signatures. I don't want to repeat the process of adding signatures to my Outlook profile every time I purchase a new computer, or wipe out my hard drive and do a fresh install, which I like to do when I install a new operating system. If you are in a similar boat, you too may have a need to backup and restore (import) your email signatures once in a while. Once you have them backed up, you can easily restore them to the same, or a different, computer.Backing Up Your Email Signatures
Before you wipe your Outlook profile, which may be the case when you are replacing your old computer, make sure you backup your email signatures first by copying them from the APPDATA folder in your profile in Windows 10 File Explorer. APPDATA folder is a hidden folder and instead of showing you where it's located and how to unhide the folder, I am going to show you a much simpler way to get to it. Either type the following in the Start, Run box or in the Windows search box in Windows 10/8.1/8 to quickly get to the APPDATA folder: %APPDATA%\Microsoft\Signatures Let's say you want to backup all your signature for future use in a folder called C:\Backup\Email Signatures. Follow these instructions.- Close Microsoft Outlook, if it's currently open.
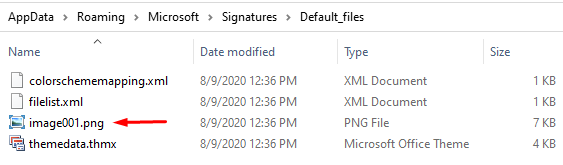
- In the Windows search box type %APPDATA%\Microsoft\Signatures and press Enter.
- Go to Windows 10 File Explorer and copy all the files and folders in the %APPDATA%\Microsoft\Signatures hierarchy to C:\Backup\Email Signatures.
- That's all there is to backing up your Outlook email signatures.
- An HTML Document (.htm)
- Rich Text File (.rtf)
- Text Document (.txt)
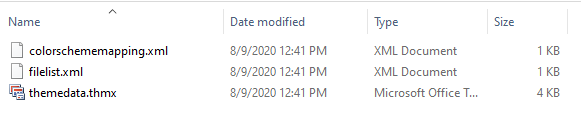
- colorschememapping.xml
- filelist.xml
- themedata.thmx
Restoring Signatures to Another Computer
To restore the signatures to another computer, simply copy all the signature files and folders from your backup location where you originally copied them (e.g. C:\Backup\Email Signatures) and then paste them to the %APPDATA%\Microsoft\Signatures folder on the destination computer. That's it. Go to Outlook on your destination computer and you should see all your signatures. Access Denied Error Depending on the operating system and the method you are using to copy from one computer to another, you may get an access denied message. For example, when the destination computer is a remote computer in an RDP session you may encounter an access denied error. If you run into this situation, use the following trick to copy the files. Rather than copy and paste in an RDP session, map a drive to the other computer and copy and paste it in a newly created folder (e.g. Temp) on the destination computer. This will ensure that you have the proper permissions on that Temp folder. Once the files are copied, go to the destination computer and copy the signature files and folders from the Temp folder to the %APPDATA%\Microsoft\Signatures folder. If you are unable to, or don't know how to map a drive between two computers, use a USB flash drive to copy the files from the source to the destination computer. Although not, required, there is one final step that I recommend you take and that is to update your signatures if you are copying your signatures from a previous version of Outlook, such as Outlook 2013, to a new version such as Outlook 2016.Updating Old Outlook 2010 Signatures
This section only applies to you if you want to restore Outlook 2010 signatures to a new version of Outlook. If you are planning to restore Outlook 2010 signatures to Outlook 2013/2016/2019, Microsoft recommends that you update the old signatures so that they use updated HTML code that uses cascading style sheets (CSS). This ensures that you won’t experience any potential problems when switching or deleting signatures in a message. The procedure is pretty simple. Here are the steps.- You can get to the Signatures areas either through the Outlook's Options, or by composing a new message and on the Message tab going to the signatures in the Include section. Either way you will end up in the Signatures and Stationary window. Let's go through the Outlook's Options.
- In Microsoft Outlook desktop app, click the File tab.
- Click Options.
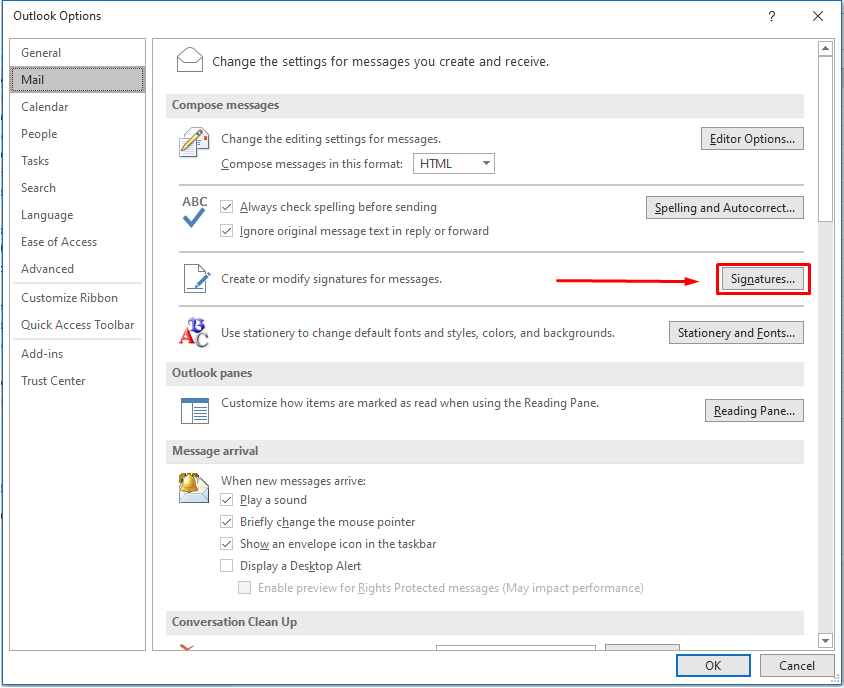
- In the left pane select Mail.
- Under the Compose messages section, click Signatures.
- In the Signatures and Stationery screen, select a signature in the Select signature to edit list.
- Click anywhere in the Edit signature box where your signature is, and then click Save. If you don’t click in the Edit signature area your option to select Save will be grayed out.
- Repeat these steps for each signature.
- Click OK twice to close all the windows.
- All your old signatures are now updated.
Related Articles
| Thanks for reading my article. If you are interested in IT consulting & training services, please reach out to me. Visit ZubairAlexander.com for information on my professional background. |
Copyright © 2020 SeattlePro Enterprises, LLC. All rights reserved.
Leave a Comment