How to Delete the Drop Off Library in SharePoint 2010

Content Organizer is a new feature in SharePoint Server 2010. If you enable the Content Organizer feature it adds a library called “Drop Off Library” to the site. The idea is that after you fill out the properties of a file, the file can be automatically moved to another library or folder according to rules created by the site owner. In other words, this is a document routing feature available in SharePoint Server 2010. In Microsoft Office SharePoint Server (MOSS) 2007 the routing feature was available for records routing in the Record Center site. In SharePoint Server 2010 it is available for all the sites.
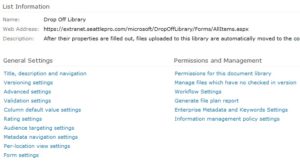
Due to a bug, or some people may consider this a “feature”, once you activate the Content Organizer feature the Drop Off Library cannot be deleted because the option “Delete this document library’ is not available under Permissions and Management.
Obviously, you can hide the Drop Off Library under Navigation but that won’t delete the library itself. I am not sure why the option to delete is not available in the Library Settings but there are a couple of ways to work around this problem. You can either use SharePoint Manager 2010 from CodePlex or you can use the PowerShell. I recommend the PowerShell option.
Option 1: SharePoint Manager 2010
SharePoint Manager 2010 is an object model explorer. You can open the site and set the AllowDeletion property to true and then save the setting.
Option 2: PowerShell Script (recommended)
The second method is to use a PowerShell script. I prefer this method because in my opinion this option is much safer and easier than installing additional software on the server. Here are the steps.
- In Windows Server 2008 go to Start, All Programs, Accessories, Windows PowerShell, Windows PowerShell ISE. DO NOT start the 32-bit version (x86), make sure you are starting the 64-bit version.
- Register the SharePoint PowerShell commands by using the following command. If you used the 32-bit version of PowerShell ISE the command will fail.
Add-PSSnapIn Microsoft.SharePoint.PowerShell - Now one-by-one run the following four commands.
$spWeb = Get-SPWeb -Identity http://YourDomainName
$spLibrary = $spWeb.GetList(“http://YourDomainName/YourSiteName/DropOffLibrary“)
$spLibrary.AllowDeletion = “True”
$spLibrary.Update()
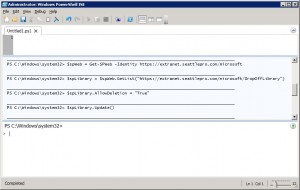
Replace the domain and site name in the above script, for example.
$spWeb = Get-SPWeb -Identity https://extranet.seattlepro.com/microsoft
$spLibrary = $spWeb.GetList(“https://extranet.seattlepro.com/microsoft/DropOffLibrary“)
$spLibrary.AllowDeletion = “True”
$spLibrary.Update()
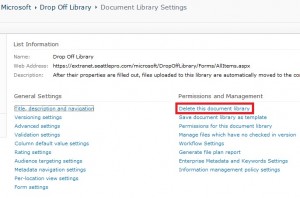
As soon as you execute the last step and refresh the Document Library Settings page, you will see the option to delete the Drop Off Library available in the GUI, as shown below. Now you can delete the library.
If you have additional sites that you need to delete the Drop Off Library, you will need to run the scripts for those sites as well.
Copyright ©2011 Zubair Alexander. All rights reserved.


