How to Increase Virtual Machine Disk Space in VMware ESXi 4.1
If you are running VMware ESXi 4.1 you can increase the size of the virtual machine (VM) relatively easily once you know how. But if you have any snapshots, it can be a pain. Keep in mind that increasing the size of the VM is different than increasing the size of the disk partition on the host computer.
Let's use the following scenario as an example. Your ESXi server's hard disk is 1TB in size and you have a VM running a Windows Server 2008 R2 guest operating system that has two drives, a 30GB drive C and a 20GB drive D. After a few months you realize that you have installed a lot of programs and your VM hard disk is running out of space. Over the last few months you have taken a dozen snapshots. You go to the vSphere Client utility and select the VM. You select Edit Settings and select the hard disk that is running out of disk space but the option to expand the disk is grayed out. This is likely if the VM has snapshots. You must power off the VM and then delete the snapshots before you can expand the disks.
Once that is take care of, you need to edit the VM's settings. Here are the steps.
NOTE: The option to Edit Settings will be grayed out if you are in the middle of deleting a snapshot.
Copyright ©2011 Zubair Alexander. All rights reserved.
- Make sure your ESXi 4.1 server has been backed up.
- Start the vSphere Client utility.
- Select the VM that's running out of disk space.
- Right click the VM and select Edit Settings.
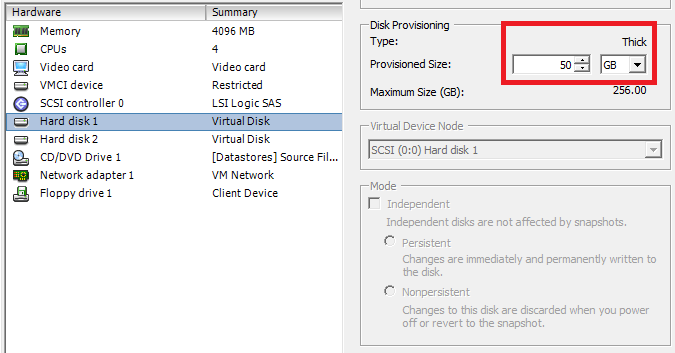
- On the Hardware tab select the virtual hard disk (e.g. Hard disk 1).
- On the right hand side, under Disk Provisioning increase the Provisioned Size then click OK. For example, if you have two disks and you want to increase the size for drive C from 30 to 50GB and drive D from 20 to 25GB, increase the size using the up arrow and then click OK.
- Restart the VM.
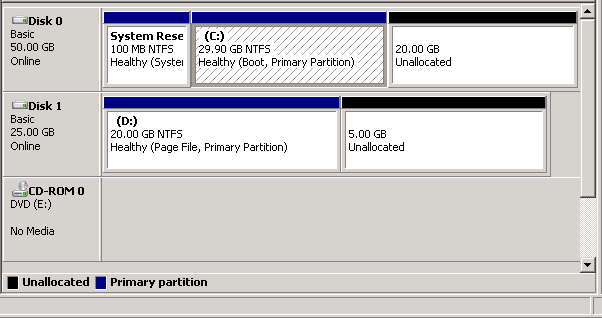
- At this point you have increased the size of the disk in VMware but you need to do the same in the operating system. In Windows Server 2008 R2 go to Server Manager, Storage, Disk Management. You will notice unallocated space at the end of the disks.
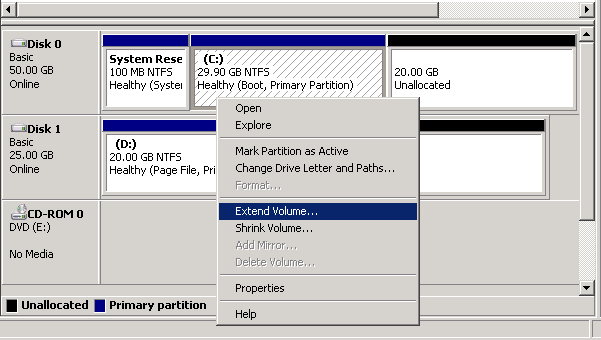
- Right-click drive C and select Extend Volume. Follow the wizard to extend the volume. It should take only a few seconds to run through the wizard. Repeat the steps for drive D.
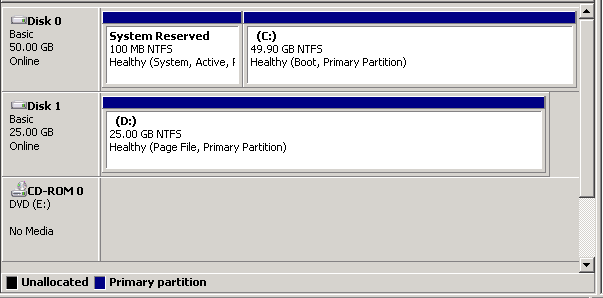
- Your drive size will increase right away and there is no need to reboot the computer.
- Logon to the ESXi host as root.
- Type service mgmt-vmware restart and press Enter.
- Type service vmware-vpxa restart and press Enter.
- Type logout and press Enter to disconnect from the ESX host.
- Connect to the console of your ESXi host.
- Press F2 to customize the system.
- Login as root.
- Using the Up/Down arrows navigate to Restart Management Agents.
- Press F11 to restart the services.
- When the service has been restarted, press Enter to exit.
- Press ESC to logout of the system.
Copyright ©2011 Zubair Alexander. All rights reserved.
Leave a Comment