How to Switch the Network Profile from Public to Private on Windows 10
[responsivevoice_button voice="US English Male" buttontext="Listen to Post"]
In this article, I will explain how to switch a network profile from public to private on Windows 10 and Windows Server 2019. First, here's a quick primer on the different types of network profiles on Windows computers (clients and servers). If you are not familiar with these profiles, I encourage you to read this section so you have a better understanding of the purpose of these profiles before learning how to switch between them.What are Network Profiles?
Windows computers have three types of network profiles: Private, Domain, and Guest or Public.- Private A private profile is meant for a computer at home or work connected to a private, internal network. This computer is part of a Workgroup and is not connected to the Active Directory domain. For private networks you can turn on Network Discovery as well as File & Print Sharing so that other computers can easily find your computer and access network shares and other resources that you have shared on your private network, such as network shares, printers, and scanners. If your computer is part of a business network, but is running in a Workgroup, rather than a domain, then your settings would depend on the security requirements.
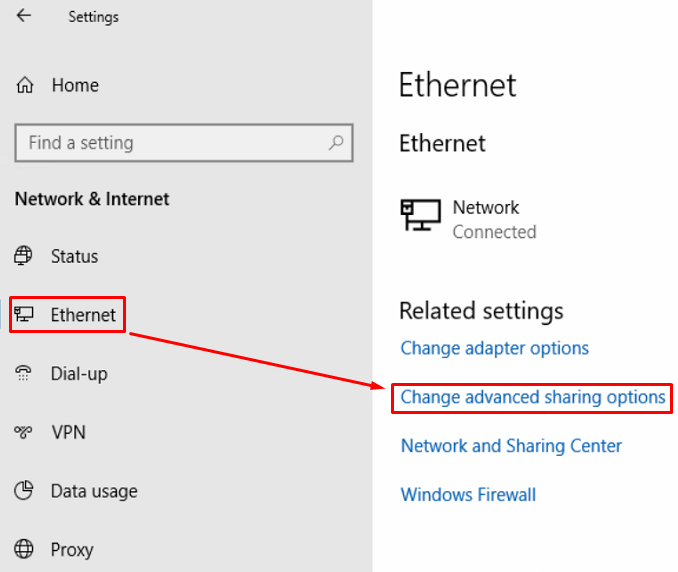
- Domain A domain profile is designed for computers in a business network that have "joined" the Active Directory domain. This offers a much higher level of security and authentication for users and devices. For domain networks the Network Discovery and File & Print Sharing may or may not be turned on. These settings are determined by the network administrators and depend on how your network is configured. The domain profile is only applicable when a computer has joined a Windows domain, which is usually the case in a business environment. Did you notice that I used the word applicable, rather than visible? That's because users can't switch their profile on a domain-joined computer so the option to switch to another profile doesn't apply and therefore it isn't visible. However, you can go to the Control Panel and configure a couple of options under Change advanced sharing options for your domain profile.
- Guest or Public A guest or public profile is designed for public networks that are not secure. This profile is used on mobile devices for wireless networks at a coffee shop or an Internet cafe. For security reasons, you want to turn off Network Discovery and File & Print Sharing on this profile because you don't want hackers to easily access resources on your laptop or other mobile device.
How to Switch Between Profiles
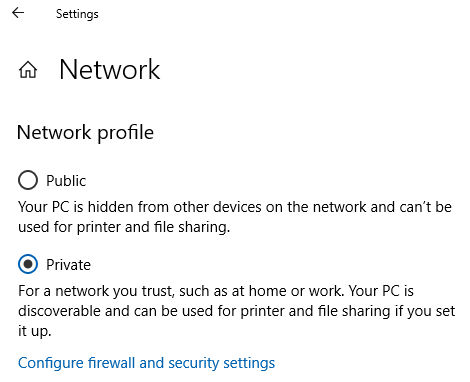
To switch between the profiles you need to click on the network icon, as shown below.
What if You Don't See the Option to Switch Profiles?
Sometimes, when you click on the network icon, instead of the option to switch between network profiles (above screenshot) you may just see the Metered connection screen.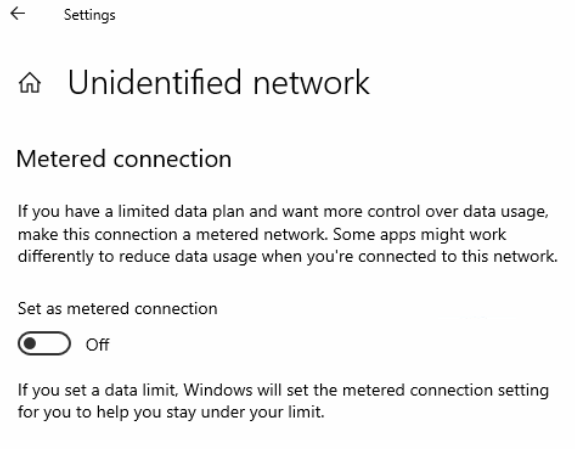
- Make sure you only have the Ethernet interface enabled for the public network that you are trying to switch. Disable all other interfaces temporarily.
- Go to File Explorer and click the blue Network icon in the navigation pane.
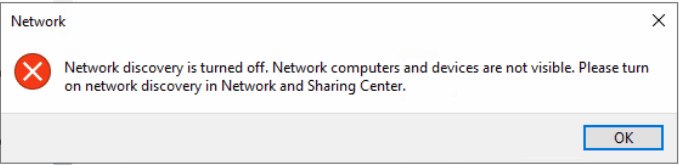
- You should see the following error message. Click OK.
- You will see the following message in the top bar. Click anywhere in the bar.
NOTE: If you don't see the above message in the File Explorer, go to the Control Panel -> Network and Internet -> Network and Sharing Center -> Advanced sharing settings and make sure that network discovery and file and printer sharing are both turned off. - From the drop-down message select Turn on network discovery and file sharing.
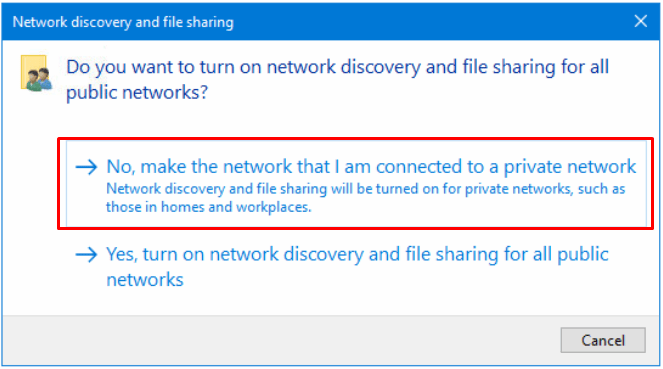
- When prompted to turn on network discovery and file sharing for all public networks, select No, make the network that I am connected to a private network.
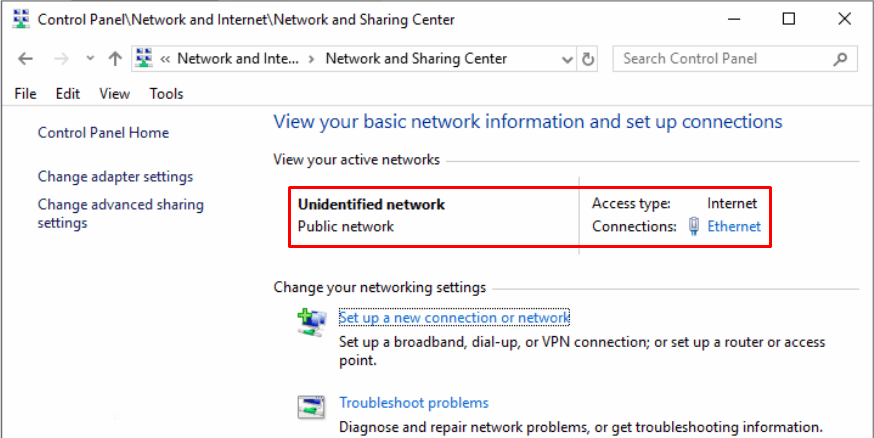
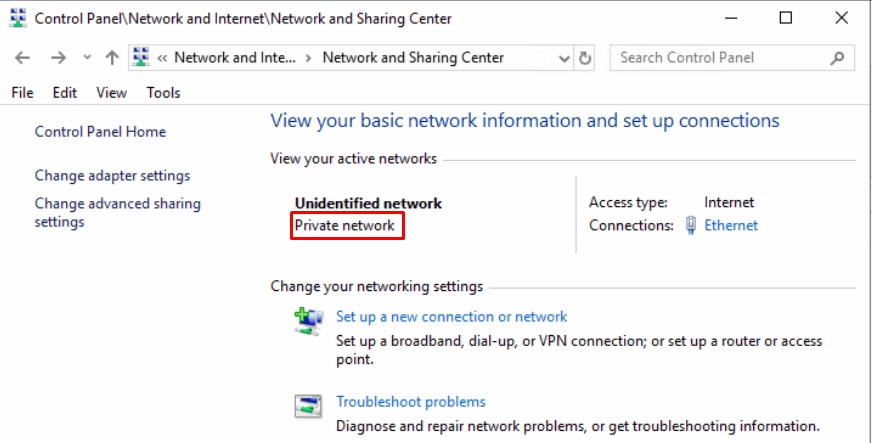
- Now if you go to the Network and Sharing Center in the Control Panel you can verify that the profile has been switched to private.
- To change the name of the network use the following PowerShell commands. The first command can be used to get the information about the connection profile and the second to change the name of the profile. Get-NetConnectionProfile Set-NetConnectionProfile -Name "NETWORK" -NetworkCategory Private
- You may also want to run the Get-NetConnectionProfile again to verify that the name has been updated.
| Thanks for reading my article. If you are interested in IT training & consulting services, please reach out to me. Visit ZubairAlexander.com for information on my professional background. |
Copyright © 2018 SeattlePro Enterprises, LLC. All rights reserved.
Leave a Comment