Secure Your Computer by Modifying the Default RDP Port Number

By default, Remote Desktop (formerly known as Terminal Services) uses TCP port 3389. If you use Remote Desktop Protocol (RDP) to connect to your Windows computer, you might want to consider modifying the default port for security reasons. Because there are 65,535 ports on a computer, by changing the default port number for remote desktop access to your computer, you are making it difficult for a cyberattacker to guess your custom port number. The attacker usually needs three pieces of information to hack into your computer:
- IP address or domain name.
- Username.
- Password.
Because most people use the default port number (TCP 3389), the attacker does not need to specify the port number. By modifying the default port number, the attacker would need four pieces of information. For this fourth piece of information the attacker has to guess from one of the 65,535 possible ports. Because some of these port numbers are reserved for various services, technically the number will be less than 65,535, but you get the idea.
The information in this article applies to all versions of the following Windows clients and servers.
Windows Clients
- Windows 2000
- Windows XP
- Windows Vista
- Windows 7
- Windows 8
- Windows 8.1
- Windows 10
Windows Servers
- Windows Server 2000
- Windows Server 2003
- Windows Server 2008
- Windows Server 2012
- Windows Server 2016
- Windows Server 2019
How to Change the Default Port
The default RDP port can be changed by modifying the registry. The procedure is identical for Windows clients and servers.
| WARNING! The following procedure requires modification to the registry and should only be done by a trained professional who knows how to work with Windows Registry. Working with Windows Registry is like doing a brain surgery on your Windows computer. Modify the registry at your own risk. |
- In the Windows Search box, type regedit.exe and press Enter. This will open the Registry Editor.
- As a precaution, you should first back up the registry. Highlight the Computer icon at the top of the registry.
- Right-click the Computer icon and select Export.
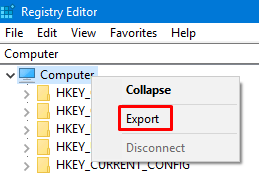
- Enter a filename for the registry backup and click Save.
- Expand HKEY_LOCAL_MACHINE\SYSTEM\CurrentControlSet\Control\Terminal Server\WinStations\RDP-Tcp.
- Double-click PortNumber in the right-hand pane.
- Click Decimal in the Base section and change the Value data to a different port number that is not in use, e.g. 56789, and then click OK.
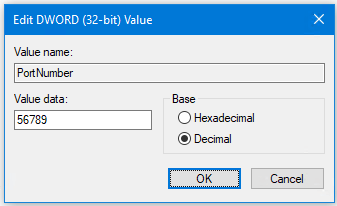
- Your screen should look something like this.
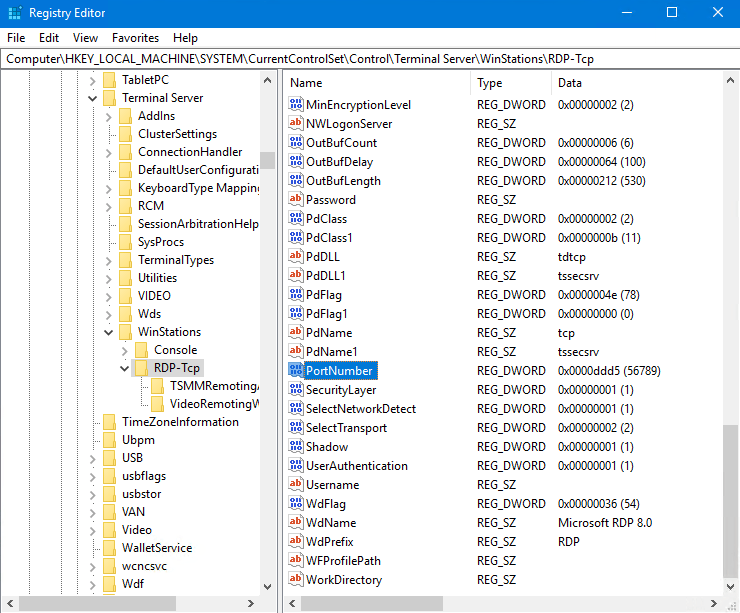
- Close the registry editor and reboot your computer.
There is one more thing that you need to do before you can connect to the computer remotely. You need to open this custom port in the firewall by adding a rule. Of course, if your firewall is disabled then you can skip this step.
| WARNING! In general, you should never disable firewall on any Windows workstation or Windows server on your network. In the old days network administrators would disable the firewall on the workstations and even servers because they felt the network firewall makes it difficult for applications to communicate on their network and they believed all the internal computers are safe behind the corporate firewall. That may have been true in the 1980s and 1990s, but those days are long gone. Today every end point on the network needs to be protected so the firewall should never be turned off on any Windows computer (at home or at business). Microsoft has made many changes to the Windows operating systems in recent years and installing applications on the Windows automatically creates rules that allow the applications to communicate properly on the network. Therefore, it’s best that you do not turn off firewall. |
Configure Firewall Rule
- Use the Windows Search box and type Control Panel.
- In the Control Panel click Windows Defender Firewall.
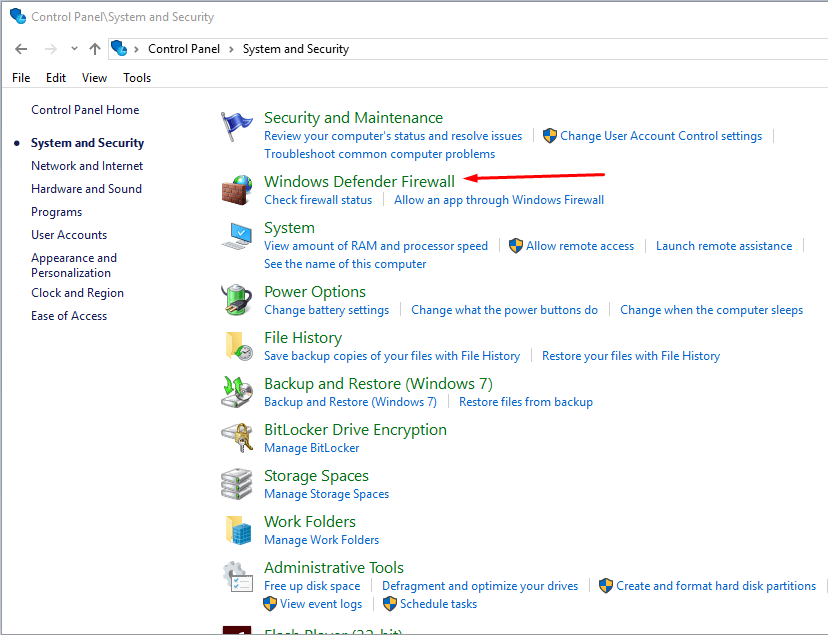
- Click Advanced settings in the left column.
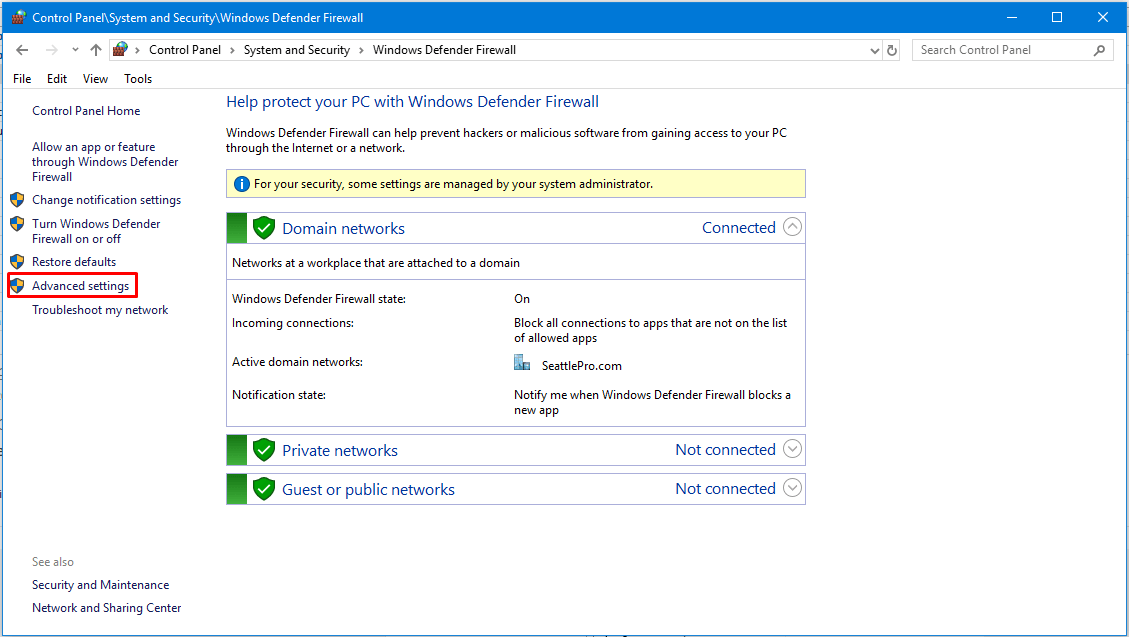
- In the Windows Defender Firewall with Advanced Security window click Inbound Rules.
- In the right-hand Actions pane click New Rule.
- In the Rule Type window select the Port radio button.
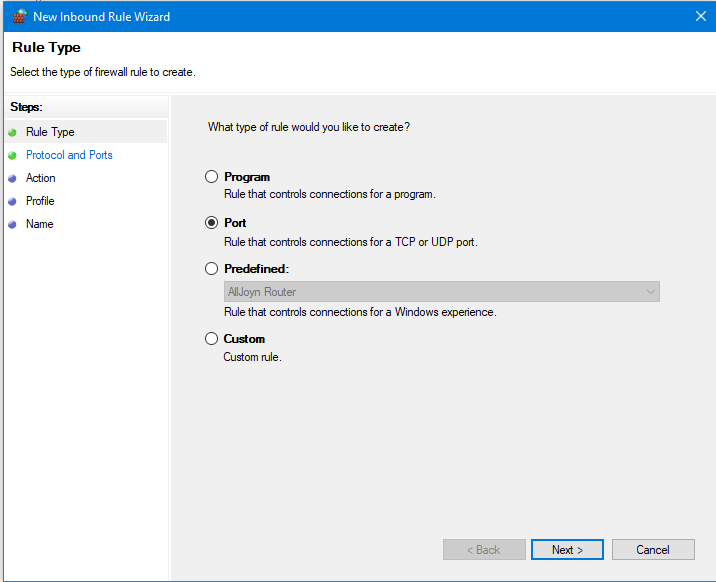
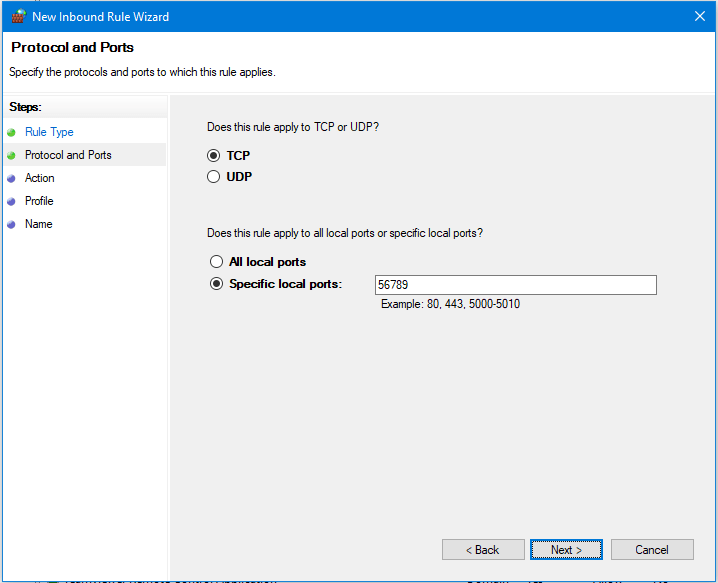
- In the Protocols and Ports window make sure TCP is select and in the Special local ports box enter the port number you want to use for RDP, e.g. 56789.
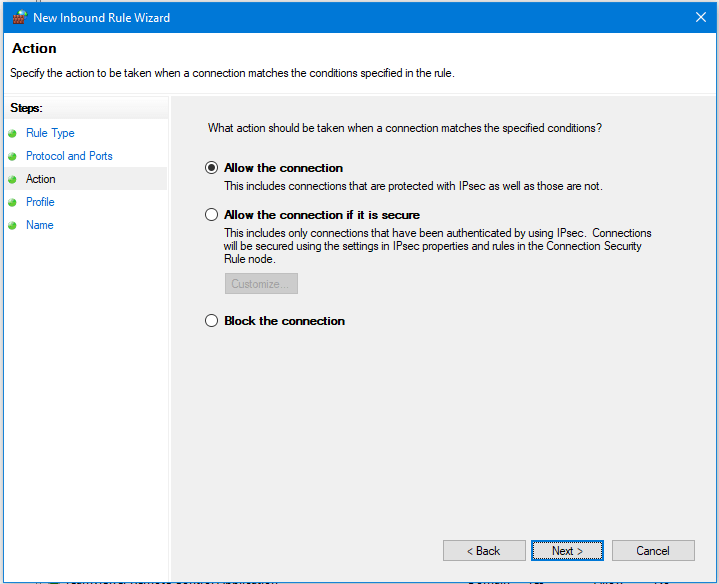
- In the Action Window click Next to accept the option to Allow the connection.
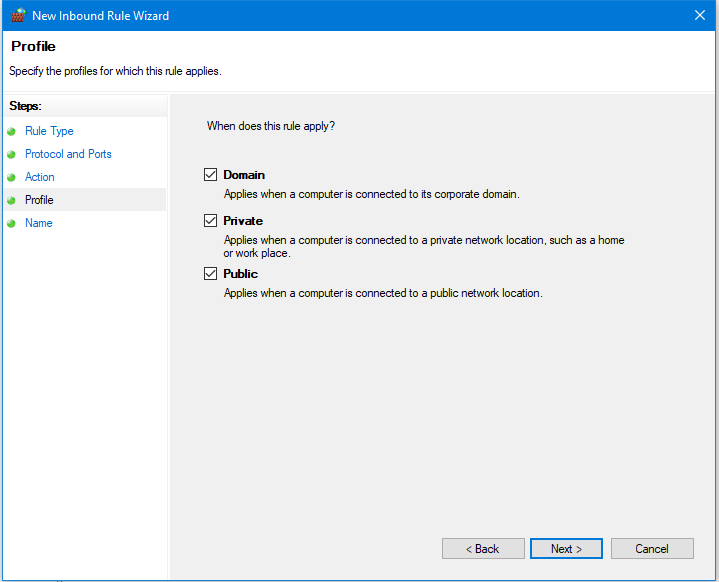
- In the Profile window click Next so the rule applies to Domain, Private and Public profiles.
- In the Name window type a name for the rule, e.g. Custom RDP Port. You can also enter an optional description.
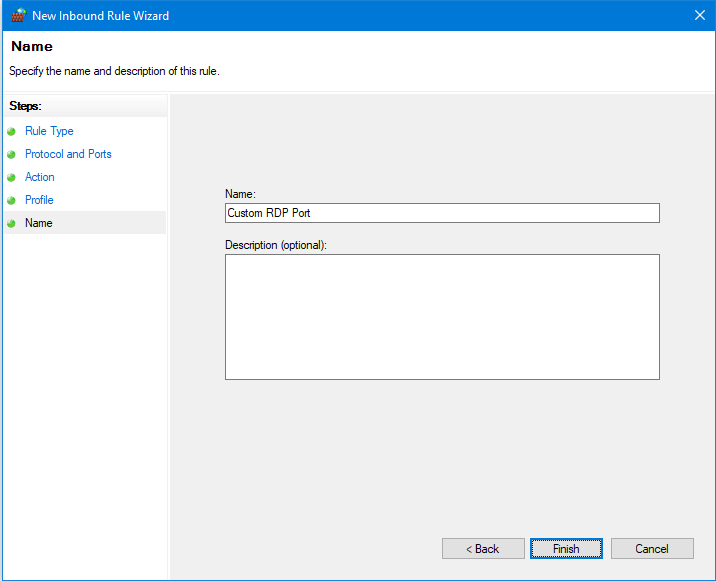
- Click Finish.
- You can double-click the rule you created to verify the settings or make any changes if necessary.
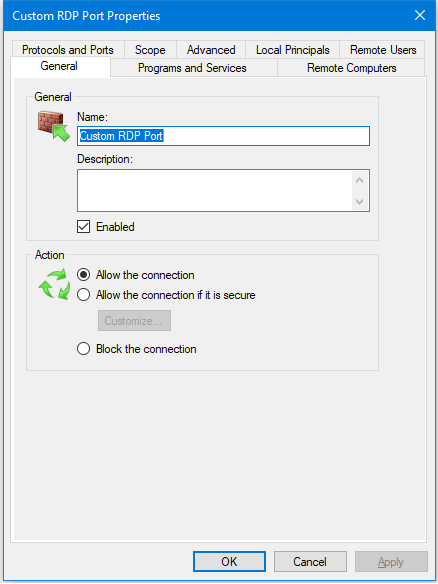
- You have successfully created the firewall rule to allow RDP on a custom port. There is no need to restart the computer. Close the Windows Firewall and Control Panel.
Connecting to a Remote Computer with Custom Port Number
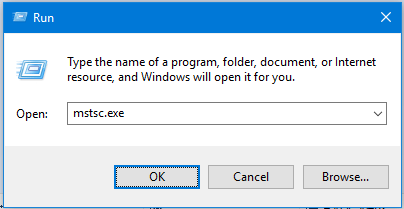
- In the Windows Search box type mstsc.exe and start the Remote Desktop Connection app.
- Type the computer’s IP address or the domain name, followed by the custom RDP port number, e.g. CONTOSO.COM:56789, and then click Connect.
NOTE: If you were to use an IP address, you will still enter the port number at the end, e.g. 10.1.1.52:56789.
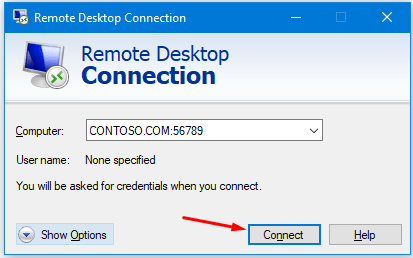
- When prompted, enter the username and password to connect to the remote computer.
To determine which port number to use, visit TCP/IP port numbers. Port numbers 0 through 1023 are called well-known ports, while port numbers 1024 through 49151 are registered ports. It’s best to pick one of the port numbers between 49152 and 65535 because these are dynamic or private ports and are not likely to be used by any application or service that you are running. If you prefer a port number with four digits, just pick a random port number higher than 5000 and you should be in good shape.
| Thanks for reading my article. If you are interested in IT training & consulting services, please reach out to me. Visit ZubairAlexander.com for information on my professional background. |
Copyright © 2018 SeattlePro Enterprises, LLC. All rights reserved.


