Understanding and Solving Virtual Switch Problems in Windows 8 Hyper-V

Hyper-V works great in Windows 8 and Windows Server 2012. However, there are situations that will drive you crazy when working with the Virtual Switch, especially if you were to replace your network card or add an additional card.
Although Hyper-V in Windows Server 2012 and Windows 8 is essentially the same technology, in this scenario I will assume we are working with a Windows 8 Enterprise computer that has a single Network Interface Card (NIC). We want our host computer running Windows 8 Enterprise and all the virtual machines (VMs) in Hyper-V to be able to connect to the Internet.
In Hyper-V there are three types of virtual switches available to you.
1. External – This lets your VMs connect to the Internet, your internal network, and other VMs.
2. Internal – This lets your VMs communicate with your host computer as well as other VMs, but not the Internet.
3. Private – This will allow your VMs to communicate with each other but they can’t communicate with the host computer or the Internet.
Let’s assume that we name our three connections as follows.
a) Connect to Internet (External)
b) Connect to Home Network (Internal)
c) Connect to VM Network (Private)
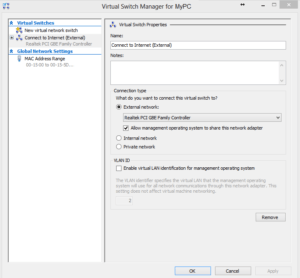
In our scenario we want to use the External virtual switch. When you create the External switch, make sure that the box Allow management operating system to share this network adapter is checked, otherwise your VMs will not be able to connect to the Internet.
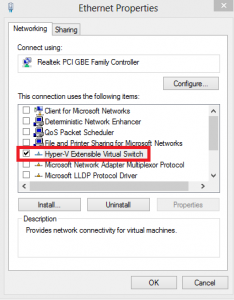
The problem that you may run into is that as soon as you create the External virtual switch you will notice that your host computer is immediately disconnected from the Internet as well as your LAN. If you look at its configuration, it will look like the graphic below. The only box that is checked is Hyper-V Extensible Virtual Switch. This is your physical NIC that is acting as a Hyper-V Switch. Do not check any other boxes on this NIC, not even the Internet Protocol Version 4 (TCP/IPv4) box. Just be patient and read on.
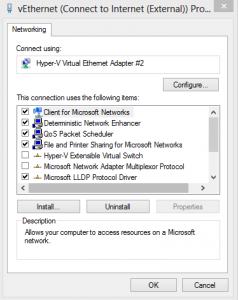
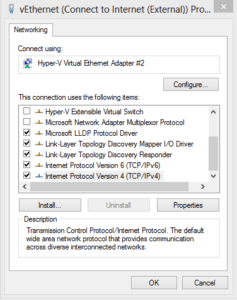
You will also see another Hyper-V Virtual Ethernet Adapter that is called vEthernet. In my example it will be called vEthernet (Connect to Internet (External)) because of the name I have used for the connection. If you look at its properties, it will have all the settings that your physical NIC had before you created the virtual switch. The only problem is that this NIC may not be getting any IP address from your DHCP Server or router. As a result, neither the host computer nor the VMs can connect to the Internet.
As I mentioned, as soon as you create the virtual switch you lose Internet connectivity on your host computer. The solution is simple. Disable and re-enable the vEthernet NIC. This will allow your vEthernet adapter to obtain an IP address (if it’s configured to obtain an IP address automatically) and you will be able to connect to the Internet on your host as well as your VMs. By the way, this virtual Ethernet switch is what will be displayed in the Networking and Sharing Center, not the physical NIC, because this virtual NIC has the IP address for your physical (host) computer.
Copyright ©2013 Zubair Alexander. All rights reserved.


